Hello Everyone,
Today I am going to show
you how to create a Blog button with a grab box below. This tutorial should
work on most blog platforms that allow you to add custom HTML widgets. You can
place your widget either on your blog sidebar or footer. Personally, I like to
have my blog button on my sidebar. I feel that it is easier to find that way.
However, do what works best for you.
STEP 1: First off you are
going to need an image with a size under 200x200px. You can have a larger one
if you choose, however most people are more likely to use your button if it is
on the smaller size. Ideally, the size of your button should be either 125x125px
or 150x150px. I find that these sizes are the most commonly used. My blog
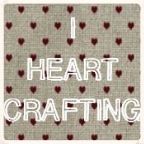
button is 150x150px. Now you can create a blog button image using Photoshop,
however personally I use PicMonkey. Once you have created your image, you are
ready for the next step.
STEP 2: Next you will need
to upload your image to a image hosting service like Picasa or Photobucket.
Once you have successfully uploaded your image, you must get the image URL to
use in the widget code.
Here is an example of what
a Blog Button with a Grab Box Looks Like

This is what it will look
like when you select the text in the box and add the HTML code to your blog.
STEP 3: Grab the button
code below.
Here's the button code:
<!--grab button header
--><div class="grab-button" style="width: 150px; margin: 0
auto;"><img
src="http://i1240.photobucket.com/albums/gg483/jasurprenant/For%20My%20Blog/6286bca2-3dd2-403f-9a9f-754884e13965_zps14b0ec36.jpg"
alt="I Heart Crafting" width="150" height="150"
/><!--end grab button header --><!-- button code box --><div
style="margin: 0;padding: 0; border: 1px solid gray; width: 150px; height:
150px;overflow: scroll;"><div class="I Heart Crafting"
style="width: 150px; margin: 0 auto;">
<a
href="http://iheartcraftingblog.blogspot.com/"
rel="nofollow"><img
src="http://i1240.photobucket.com/albums/gg483/jasurprenant/For%20My%20Blog/6286bca2-3dd2-403f-9a9f-754884e13965_zps14b0ec36.jpg"
alt="I Heart Crafting" width="150" height="150"
/>
</a></div></div>
<!--end grab-button --></div>
STEP 4
URL of your button image:
Replace my image URL with yours.
Name of your Blog: Replace
my blog name with yours.
Blog address: Replace my
blog web address with yours.
Size: If you did not use a
150x150px image, then you need to change the height and the width to the size
of your image.
STEP5
Next select the entire
code (with your information) and place it where you would like the button to
appear. If you are using Blogger you would go to layout, press "add
gadget", scroll down to HTML/Javascript and paste the code.
Finally, you may want to
do a button test to make sure that it is working properly. That's it! Now other
bloggers can "grab" your button and display it on their blog.
Hope you have found this
tutorial helpful.
Jenn


No comments:
Post a Comment
I hope you have enjoyed reading this post. Please feel free to leave a comment or suggestion. I welcome constructive criticism, however please be respectful and considerate when leaving this type of comment. This blog is a place of love, creativity and learning. I love connecting will other bloggers, like-minded people who share similar interest and new readers. Feel free to introduce yourself. Thank you!!
♥ Jenn